Saturday, September 24, 2011

Bridal shower and Beach cakes

It seems like all my crafting lately has been in edible form. Here are a couple more of the cakes I did this last summer.

This first one was for a bridal shower. The groom proposed to the bride at a horse ranch, and the wedding was to be this fall. I used these ideas along with the wedding invitations to design the cake. The pictures were taken the night before delivery. The next day, I first had issues with the cake when I realized there was a crack in the fondant on the back of the top tier. :o( Then, two minutes before we were to load them into the van, it started pouring. I don't mean just pouring, I mean "the sky's open and everything is dropping right here and right now" kind of pouring! Angel held a large umbrella and I held a tier directly under it, but it was still drenched when we reached the car. I had her bring paper towels with the next tier so I could pat dry the cake as best I could. I'm not sure who was "crying" more, me or the cake. The black outline of the design began to bleed down the sides, the whole thing looked shiny. Oh well, not much I could do but keep patting and praying. Thankfully the sky cleared by the time we reached our destination and I was able to get most of the bleeding black off the cake. The women at the shower said it was wonderful and they liked the shiny appearance. It really looked like I had emptied a spray can of lacquer on the cake. Well, I am always reminding myself that this is not heart surgery, no one is going to die if the cake isn't perfect. :o)


Here's another cake I did that same weekend. This one was a bucket of sand with seashells and flowers for our church fellowship. It was actually a small cake along with a lot of matching cupcakes. I forgot to take my camera with me, but since we all ate the cupcakes and never cut the main cake, I was able to take a couple of pictures of it when we got home. It gave me troubles too. :o( Because of the design of the cake, I was afraid the fondant would slide down so I kept the cake in the refrigerator until we left for church to keep the fondant stiff. I'm not sure if refrigerating it is what caused this, but by the time we got home, there was a HUGE bubble on the side of the cake. I'm not sure I will try refrigerating a cake again. I'll have to do some more research on that.

I was trying to get a picture without the bubble showing.

Is that not the funniest thing?
I think I will close here. I have several more cakes to post, but that will wait till next time.

Till then...
God's love and blessings!

Monday, September 19, 2011

Golf Cake

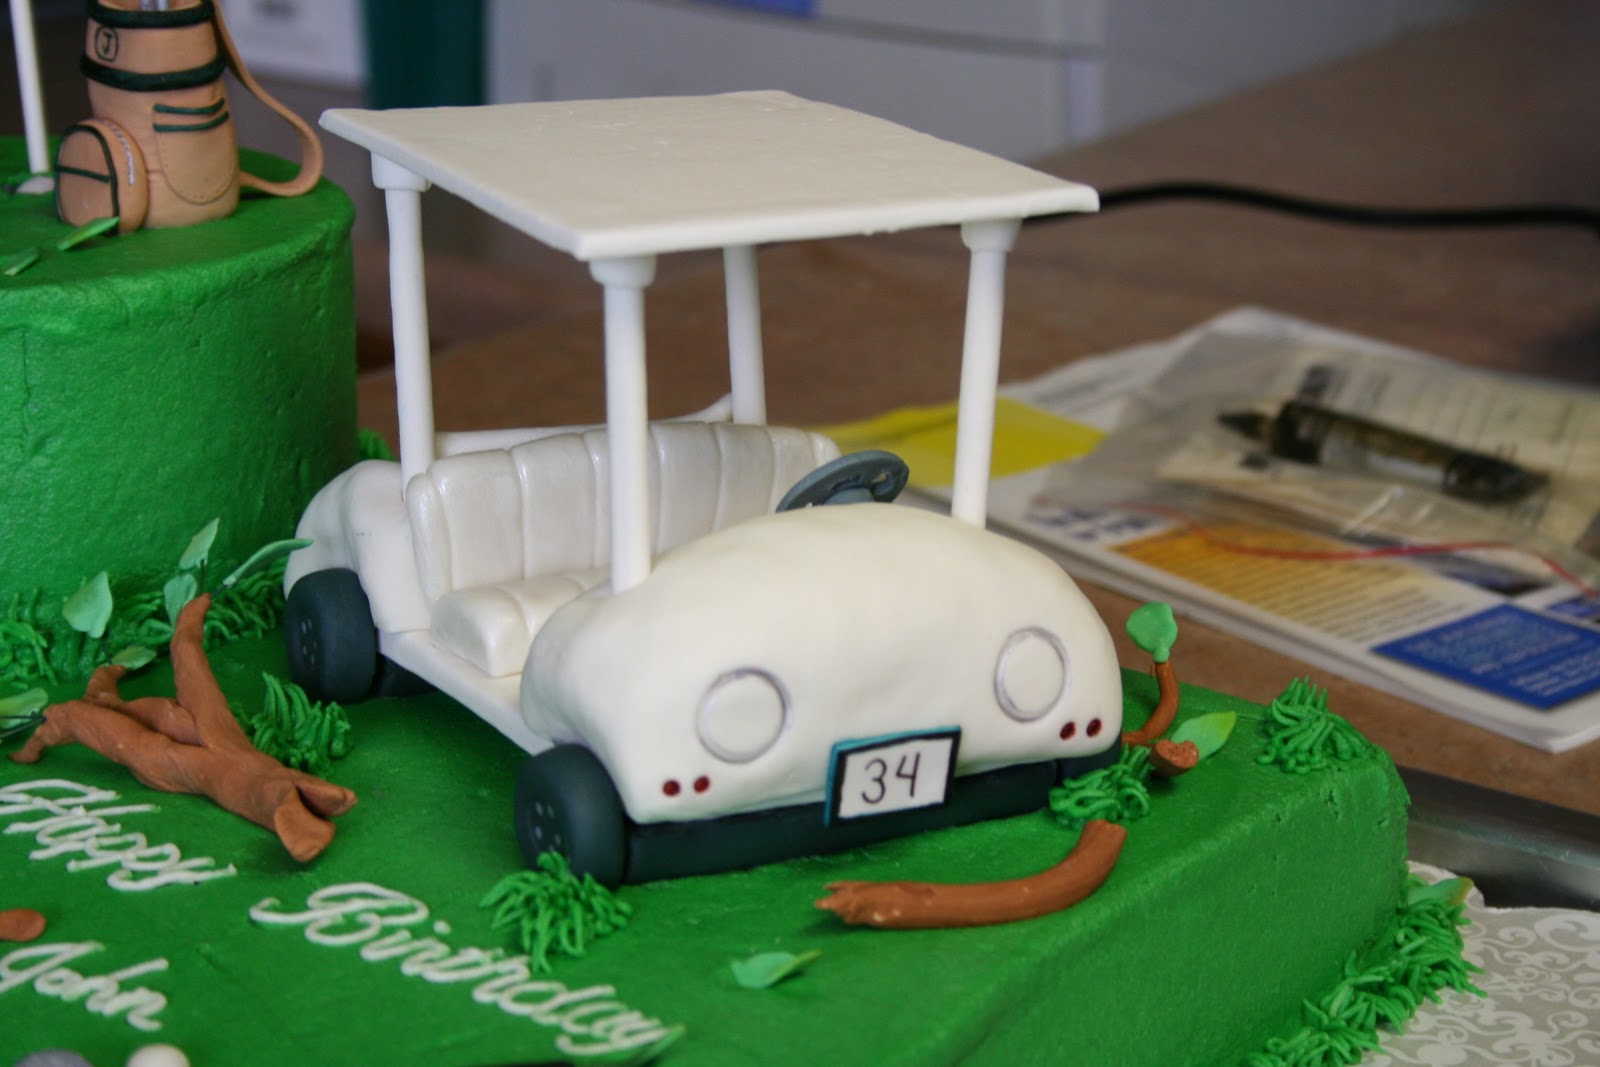
Here's the golf cake I promised last time. This gentlemen runs a golf course nearby so the theme had to be golf of course. This is what the cake was originally going to look like.


Unfortunately, a week or so before the party, we had a big storm come through  that took down a lot of trees in the area. Apparently the golf course workers had a lot of clean up to do afterwards, so we decided to memorialize the situation in cake.


I made the golf cart from rice crispy treats after seeing a similar one online. That was by far the trickiest part of the cake, but it was definitely fun to do.


I guess I will close this here. Last week was crazy with cakes, so I have plenty more to post, but I'm enjoying some down time right now and think I may go snuggle with my little one.

Till next time...
God's love and blessings!

Saturday, August 13, 2011

Learning something new

So I'm finally getting around to posting the Dr. Seuss cake photos. I have to say that I really enjoyed doing this cake, and I learned a lot as well. As with most of my cakes, the ideas didn't come just from me. I spend time in prayer before I do a cake. I pray for those I'm making it for and pray that it will be a blessing to them. I ask for ideas and then I ask for help in implementing those ideas. :o) I then spend some time on the internet searching out pictures of cakes others have done and try to find ones similar to what I have in mind. I found quite a few for this one and I pulled bits and pieces from several to come up with this.

I covered the cakes with buttercream and used rolled fondant for the decorations. I traced everything with black icing to mimic the look of Dr. Seuss illustrations.

The layers of cake for the hat were alternating strawberry and vanilla so they would get the striped look when it was cut.

I think this little guy was my favorite part. His bowl is made from a Coca Cola ornament shaped bottle with the top cut off. I molded him and the water from fondant and let it harden for a few days. Next time I may use gumpaste just because it's easier to work with when molding.

Covering the hat was the hardest part. I actually used two layers of fondant. The first one was plain white and I simply wrapped it around the cake to help hold all the layers together. Then I wrapped alternating red and white fondant over that to give the striped look. One thing I should have done was sharpen the end of a dowel and run it straight down through the hat and the two bottom tiers. It would have made transporting the cake a whole lot easier.

Well, I hear thunder, which means my power will go out in a minute, so I better close this here. Next time I will post the golf cake I finished a couple of weeks ago.

Till next time...
God's love and blessings

Friday, June 3, 2011

I'm back!

I've been pretty busy around here with all the usual stuff of being a wife, mom and home school teacher, so I haven't been very good at keeping this blog up to date. I have had several requests lately for a place for people to see my crafts, and especially my cakes, so I decided to try and get on here more often and post updates.

I will start with cakes, lots and lots of cakes! The last 2 weeks I finished 12 cakes, most of which were for graduations. This first one was the first time I've tried working with chocolate clay. It was a lot easier than I thought and came out quite well.

Any Portal fans out there will recognize this cake. The sign next to the cake was drawn with food "chalk" on rice paper to represent a scene from the game.

These next three pictures were from a set of cakes done to honor 4 young men. Each of the single "books" represented one young man and his particular interests, and the center stack of "books" was to represent their schooling in general. Sorry for the poor lighting. I took the picture on site.

I made the metronome, mouse, and camera from Rice Krispie Treats. The calculator, pencil, film, and clapper (I have no idea what that is really called) out of marshmallow fondant. The notecard is made from edible rice paper.

I learned a lot from these cakes. I don't think I will ever try to cover a cake as large as the history book with fondant again. I learned that it's a good idea to crush the Rice Krispies a bit before making the treats so the surface is not so bumpy to cover. I also played with some new flavors of cake and fillings. YUM!

These next ones are for another Open House. I did three sheet cakes with this design and one with the dune buggy. The caps on the sheet cakes were made from Reese's Peanut Butter Cups and Ghirardelli squares, and the diplomas are fondant.

The dune buggy was also made from Rice Krispie Treats covered in fondant. It was made to look like the dune buggy the graduate and his father built together.

I'm glad that these are all finished and pray that they were a blessing to the recipients. I get to do a Dr. Seuss cake this week, and I have a baby shower and a wedding cake to do at the end of the month so I'm sure I will be posting more cake pictures later.

Till then...God's love and blessings!

PS. If you click on a picture, you can see the details much better.

Saturday, November 21, 2009

Christmas Workshop!

Between taking care of sick family and making cakes, I've been busy trying to finish the projects for my Christmas Workshop. I still have 2 full sheets of patterned cardstock to play with, but I think I have enough done to post pictures and you will simply have to be surprised by the last few projects. :o)

Here's a shot of what I have so far. You can click on the image to see a bigger picture. I think the angel ornament is my favorite.


There's a basket with 14 cards and envelopes in it, a 6 x 6 envelope album, a mini fold out album, 2 calendars, a "mug" of cocoa, 2 ornaments, pull treats, a lip balm "purse", and several goodie boxes. Here's some inside shots of a few.

The 6 x 6 envelope album:


and the fold out album:


Here's the 14 cards.

As I mentioned in the previous post, there are 2 kits available, one for those far away and want me to mail a pre-cut, pre-stamped kit with instructions, and one for those who can come to my workshop to assemble their goodies. The dates for the workshops are listed below, please RSVP with the date and time you would like to come.

Thursday, December 10 10 am - 7 pm
Friday, December 11 10 am - 7 pm
Monday, December 14 10 am - 7 pm
Tuesday, December 15 10 am - 7 pm

You may choose any time that works best for you on one of these dates. I put 7 pm as the ending time simply meaning that that is the latest I want anyone to arrive. This class will take 3 - 4 hours so if you come any later than that, it will be a VERY late night for us. Also note that you will need to bring your own adhesive and you will probably need a refill or two. There are a LOT of projects here. Also, for the 3-D items, I recommend "sticky strip" or something equally as strong. I can order this for you from SU if you like. Let me know when you reserve your spot for the class.


IMPORTANT NOTE: Because this class will require a lot of prep work on my part, I will need to have all reservations and payment no later than November 27th. The class fees are: Mail out kit-$60, workshop kit-$50.

Don't forget, the first 10 to reserve their spot/kit, get an extra project, supplied by me. And, as usual, I always have a special gift for anyone who introduces me to a new friend either by workshop or by mail.

Tuesday, November 10, 2009

Back in the Swing again!

I am so excited! I'm teaching again. :o) I held my first two card classes since we moved back Stateside. It was a lot of fun, and it really got the juices flowing for some new ideas for classes. Unfortunately, I'm a little behind the ball on Christmas planning, so this first class might seem a bit rushed, but I have so much planned for it and I want to make sure everyone is able to get their goodies finished in time for Christmas. So, I'm going to tell you about the class before I even have samples to show you.

So, with that in mind, here's most of the details. I am planning a Christmas Workshop designed around the Stampin' Up! Simply Scrappin' Kit Christmas Jingle. At first the plan was to make a 6 x 6 envelope album and some Christmas cards with the leftover pieces, but once I started planning the layouts and designing everything, I realized there was a LOT of supplies left over in the kit. Not wanting to waste anything and knowing how so often we finish a project or two and then put the remaining kit away never to be seen again, I decided to see what else I could come up with. WOW! You sure can get a lot of goodies out of one scrapbooking kit! Here's my list so far:

6 x 6 envelope album
14 cards with envelopes
decorative basket to display Christmas Cards in
mini fold out album
cocoa "mug" gift set
mini treat box
post-it clipboard
magnetic calendar
chapstick gift holder
pull treats (for chocolate bars, microwave popcorn, cocoa mix, etc.)
candy wrappers (for chocolate bars)
ornaments
and tags

And, I'm not done yet! Unfortunately, I just ordered the kit, so I'm designing all of this on scratch paper and don't have any samples to show you. As soon as my kit gets here I will put everything together as quickly as I can and get some pictures posted. In the meantime, I wanted to get the word out for those of you who live quite a distance that might be interested. I am planning on putting kits together for you, stamping the needed pieces and even cutting everything out and sending it out to you along with the needed instructions. That way you won't have to have the stamps and punches to finish the projects. All you will need to provide is adhesive and the goodies to go in the gift boxes (ie. cocoa packets, chocolate bars, etc.)

Right now, your kit will include:

the Christmas Jingle Simply Scrappin' Kit
15 yards (1 spool) of grosgrain ribbon
20 envelopes
10 clear rhinestone brads
7 sheets vanilla 8.5 x 11 cardstock
and a few little extras (clip, acetate sheet, etc.)

For those who live farther away and want the pre-stamped, pre-cut kit, the cost will be $60. This will include shipping and WI taxes. Yes, guys, we have to pay taxes now that we're back in the good ole USA, and since the supplies will originally be sent to me, it will be WI taxes. I will need to have a check or credit card info by November 20th so that I will have time to prepare the kits and get them out to you by the end of the first week of December.

For those of you who live closer by and can come to my house for the workshop, the kit will be $50. Your kits will be pre-cut, but there will be some stamping and punching involved along with the assembling. Since I expect this class to be a bit longer than a usual workshop (maybe 3-4 hours), I am setting aside several different dates and times to be available and you get to choose the one that works best for you. I'm thinking the first week of December, but I will let you know more specific times as it gets closer.

I am very excited about this workshop! I've been having a fun time coming up with ideas and figuring out how to get the most out of the scrapbooking kit. I can't wait to have some samples to show you. Until then...

God's love and blessings,
Tammy

PS. The first 10 to sign up (with payment) will get a special surprise project in their kits!

Saturday, September 19, 2009

Punctual, I am not!

So, keeping on a weekly schedule, just doesn't seem to work very well for me. I mean to sit down and post something regularly, I really do, but it always seems that life just gets in the way. I guess if it didn't, I wouldn't have anything to write about! And today, I do have several things to show you. Last week's challenge was to watercolor something. Well, that I did--x7! I made invitations for the girls' Mother/Daughter Tea Party. Isn't this stamp cute?


This is the inside of the card. It's hard to tell in this photo, but the bear and cup are popped up off the background.

I made these little boxes to hold the treats Angel made for each of the guests. They were made using one of the Big Shot dies from Stampin' Up!


Here's a close up of the jewelry items Angel made. She made the bracelets for the little girls who attended, and the key chains for the older girls and the Moms. Aren't they cute? The butterflies were cut out with a Stampin' Up Big Shot die from shrink plastic. The large ones were stamped with Proverbls 31:30, which is a memory verse that we talked about at the party, and then they were shrunk.


I also made little teapot cookies to go in the goodie bags. I tried a new sugar cookie recipe that used cream cheese. They were really good!


Here's a picture of the items we put in the goodie bags. Each girl got either a bracelet or key chain, some cookies, a butterfly wand (I wish I had taken another picture of all of these together--they were so cute!), a fan that they made at the party, and a picture frame. Actually, they colored the frames at the party, I am printing up pictures I took of each of the girls and will give them back to them along with the girls' "thank you" notes.

I made small flower arrangments in some of my teacups and attached smaller versions of the butterflies to them. We also attached butterflies all along the sheets that were hanging along the garage walls. You can see a picture of that on my family blog.


Oh, I almost forgot to add pictures of the cake! Everything on this cake is edible (except the toothpicks holding the handle and spout on)--including the cup, saucer and spoon. This cake took several days to make, and I wasn't sure it was going to come out. The humidity was too high, and the fondant did not want to harden for me. Next time I attempt this cake, I would really like to have some petal dust to do the decorations on the china. I had to use food coloring, which doesn't blend very well, and definitely is not very forgiving.


Here's a close up of the cup and spoon. I modeled the spoon with one of my real teaspoons. The cup and saucer were also molded using a cup and saucer that I had. It was actually pretty easy to make them, just nerve wracking wondering if they were going to dry in time. By the way, you can click on any of these photos to see a really big picture of them.


Well, it's getting late so I should close this here, but first, a new challenge. This week's challenge will be to work on something holiday related. It could be Christmas cards or maybe a hand made gift you would like to give someone. It's never too early to start getting ready. The more you get done now, the less hectic December will be!

I will leave you with the scripture verse we focused on at the girls' party. "Charm is deceitful, beauty is passing, but a woman who fears the Lord, she shall be praised." Proverbs 31:30

God's love and blessings.